Follow Me On Social Media!

Thumbprint Cookie Recipe: The Best Gooey Treat You’ll Love
Introduction to Thumbprint Cookie Recipe
There’s something truly magical about a thumbprint cookie recipe that evokes memories of warm kitchens and sweet laughter. Picture this: as a child, you eagerly stood on tiptoe beside your grandmother, carefully rolling dough into little balls and pressing your thumb into the center, creating that iconic indent perfect for a dollop of jam. Those moments weren’t just about baking; they were about connection, love, and sharing delicious treats with those we cared about.
Thumbprint cookies are a delightful, nostalgic treat that transcends generations. Their simple yet versatile nature means you can fill those doughy indents with practically anything—be it classic fruit preserves, rich chocolate ganache, or even creamy peanut butter. The possibilities are as endless as your imagination.
Notably, this recipe calls for a few basic ingredients that blend harmoniously to create a cookie that’s crisp on the outside and soft on the inside. The best part? You can make them your own by choosing your favorite fillings. As you embark on this baking adventure, think about how you can recreate or even innovate the flavors from your childhood.
In this article, I will guide you step-by-step through the process of crafting these delectable cookies, along with tips to make them even more special. Impress your friends or reminisce with family as you share a plate of warm, homemade thumbprint cookies, each bite infused with love and nostalgia.
The Nostalgia of Baking with Grandma
Baking has always been more than a chore; it’s an experience steeped in tradition. Many of us fondly remember how our grandmothers had an uncanny ability to transform simple ingredients into baked masterpieces. When we followed her lead, we weren’t just learning to bake; we were building memories that would last a lifetime.
Engaging in a thumbprint cookie recipe provides a similar opportunity for young professionals looking to connect with their past or create new memories. Whether you’re teaching a friend how to bake or sharing these cookies with your own family, the act of baking together fosters bonds, laughter, and—of course—delicious outcomes. So, grab your apron and let’s dive into this delightful journey that celebrates the comfort of connection through the joy of baking.
Key Ingredients for Thumbprint Cookies
Creating a delicious thumbprint cookie recipe involves carefully selecting each ingredient to ensure that every bite is both satisfying and memorable. Let’s explore the key components of this delightful treat!
All-purpose flour
The foundation for crafting a soft and chewy cookie, all-purpose flour provides the perfect texture that complements the fruity filling. It’s versatile and readily available, making it an essential base for any cookie lover.
Baking powder & baking soda
These two leavening agents work harmoniously to help your cookies rise, giving them a delightful crunch on the outside while remaining soft and chewy on the inside. They add that perfect bite that keeps you coming back for more.
Kosher salt
A pinch of kosher salt is key in enhancing the sweetness of the sugars. It creates a balance in flavor, making each bite of your thumbprint cookies truly unforgettable.
Unsalted butter
Using unsalted butter adds a rich depth to our cookie dough, contributing to that luscious buttery flavor and a tender, melt-in-your-mouth texture that elevates your cookies to the next level.
Granulated sugar & brown sugar
This combination brings a lovely balance of sweetness and depth. Granulated sugar provides that classic sweetness, while brown sugar adds moisture and a touch of caramel flavor, rounding out the cookie wonderfully.
Egg
The egg acts as a binder, helping to create a chewy and satisfying texture in every bite. It ensures that all the ingredients come together seamlessly, providing the structure needed for your thumbprint cookies.
Vanilla extract
A splash of vanilla extract enriches the cookies with warmth and depth, rounding out all the flavors beautifully. It’s the secret ingredient that makes each cookie taste like home.
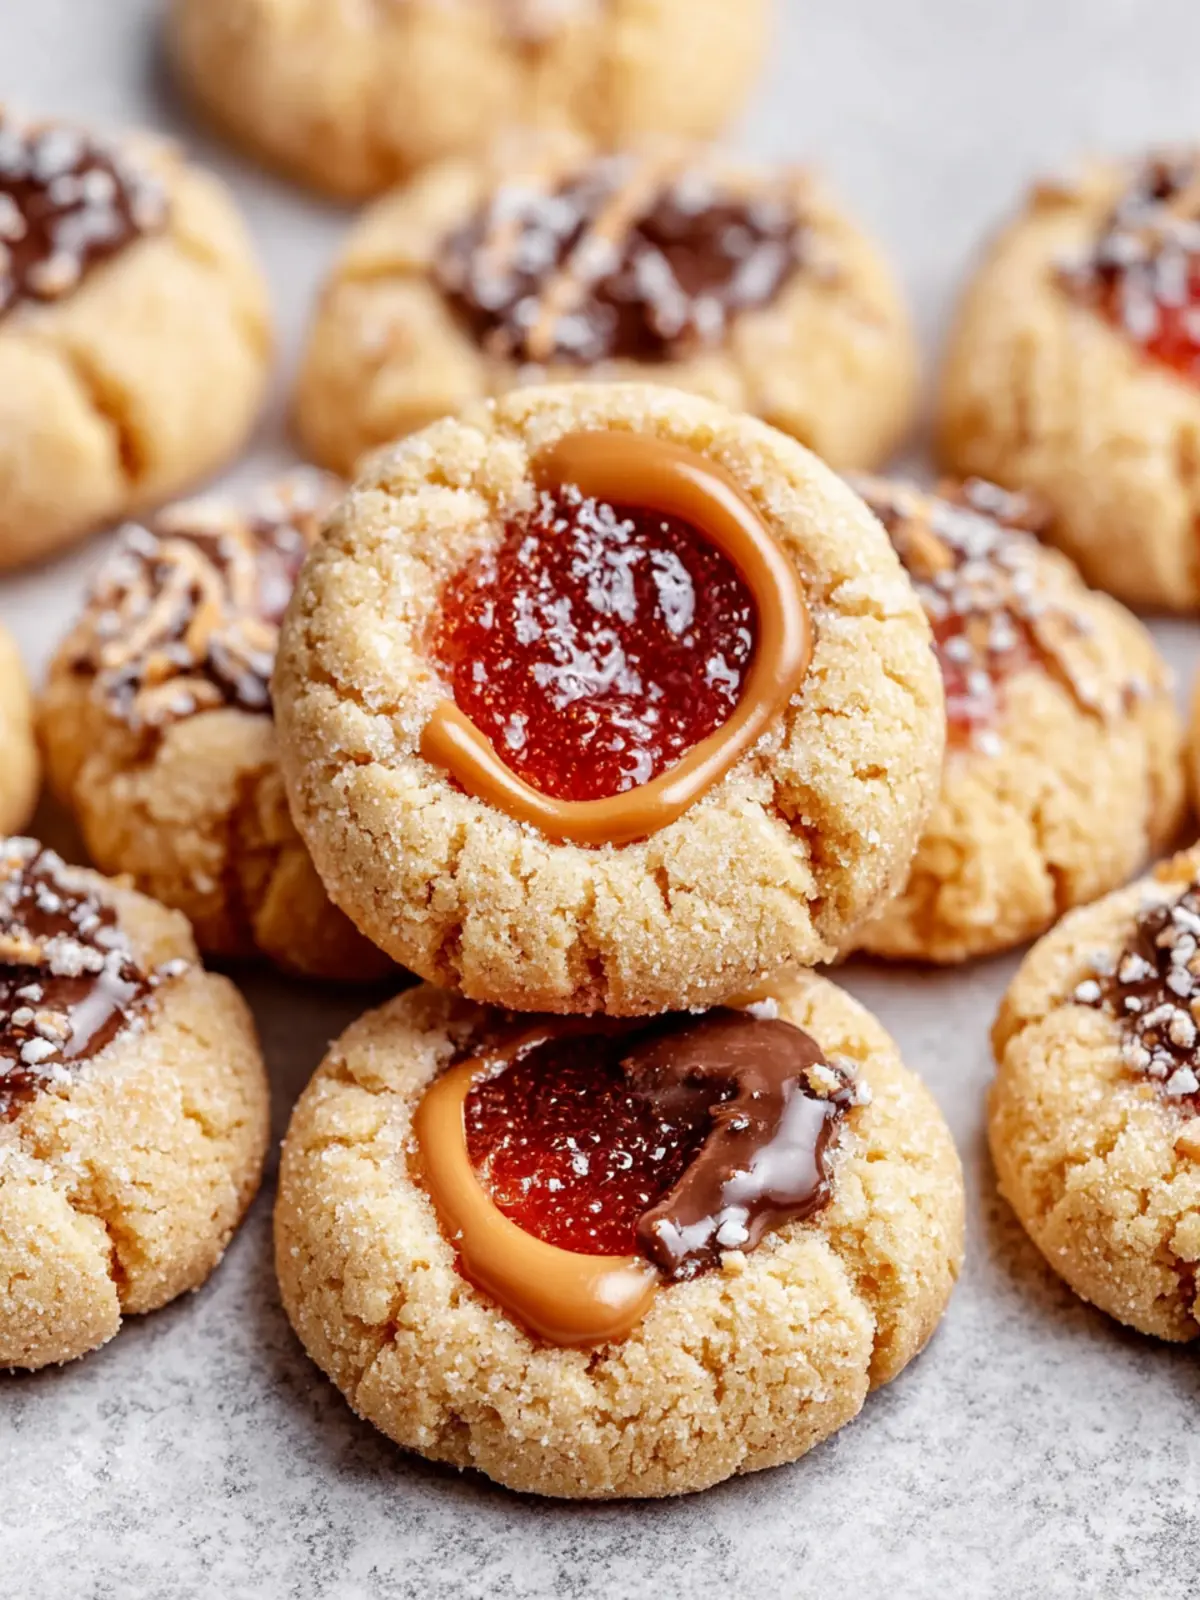
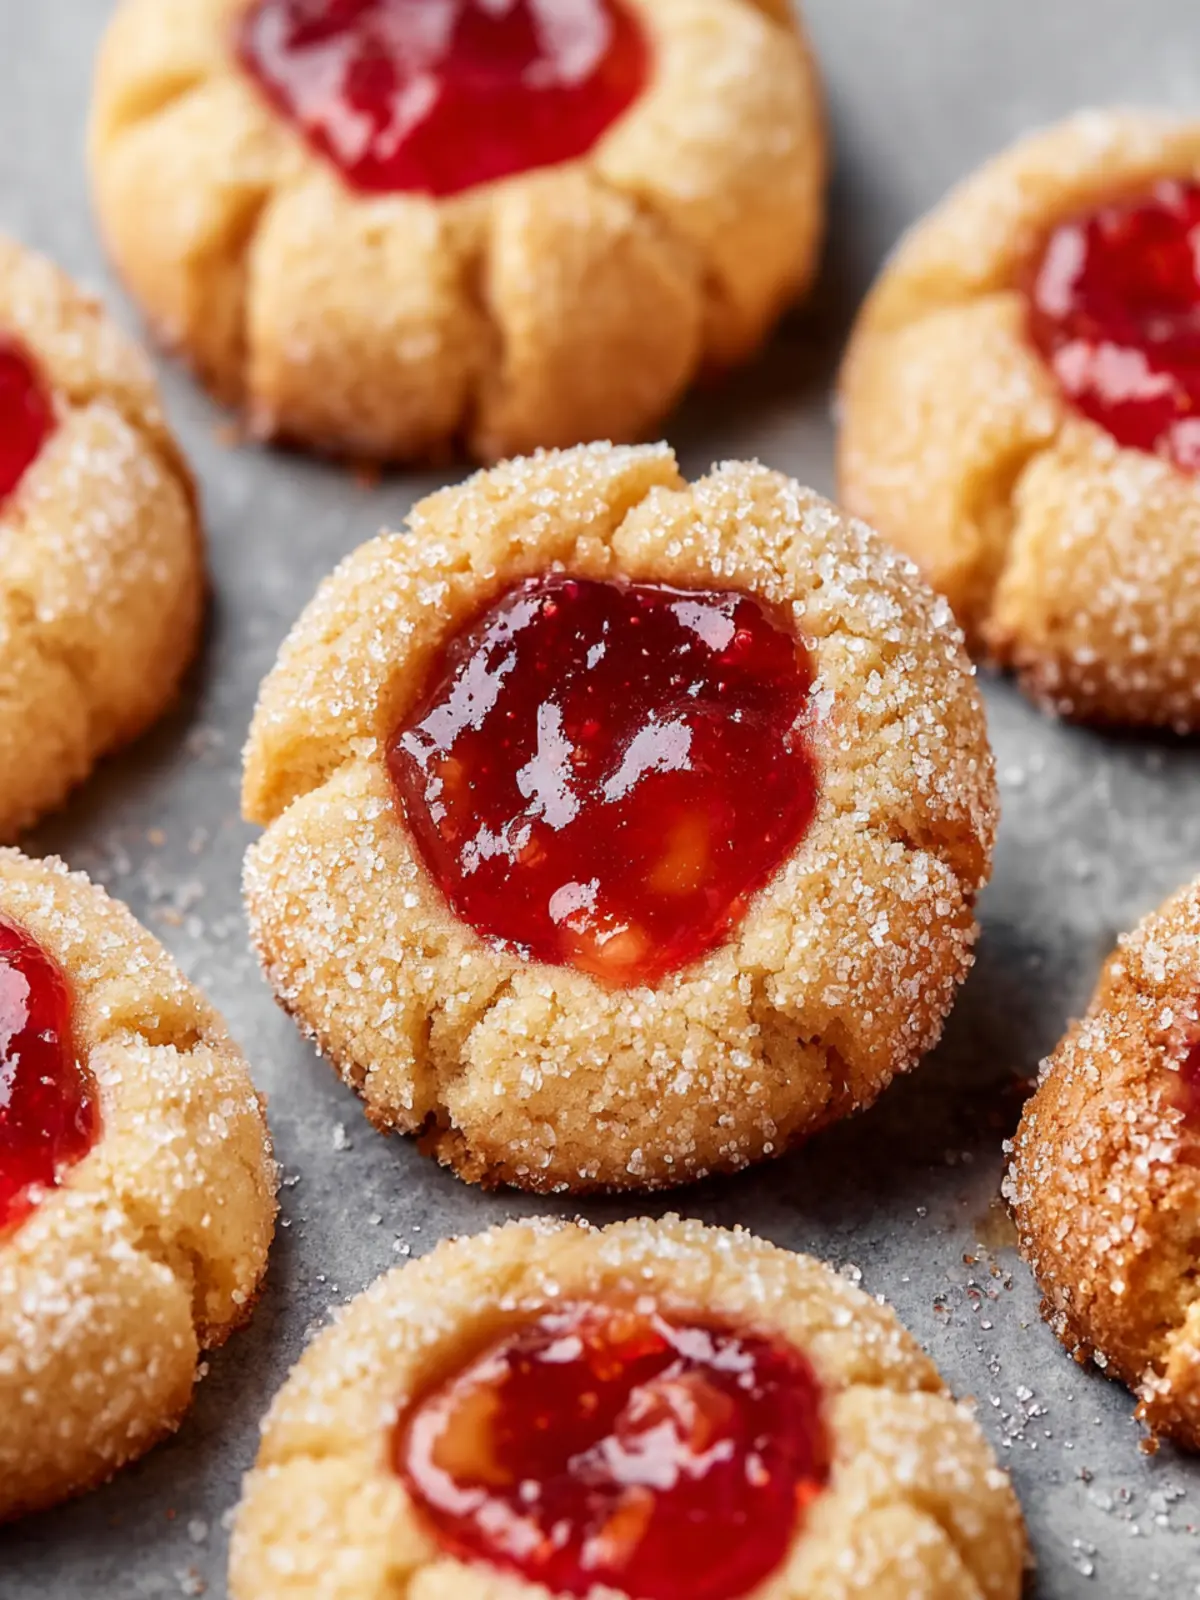
Thick jam or preserves
The star topping of every thumbprint cookie, thick jam or preserves, adds a burst of fruity flavor and a lovely pop of color that’s both visually appealing and deliciously tangy.
Granulated sugar (for rolling)
Rolling each cookie in granulated sugar before baking adds a sweet crunch to the exterior, enhancing both the appearance and texture of these scrumptious delights.
Incorporating these thoughtful ingredients will surely help you create thumbprint cookies that are not only delightful to look at but even more delicious to eat!
Why You’ll Love This Recipe
A family favorite: Perfect for gatherings and celebrations
There’s something about the thumbprint cookie recipe that brings back memories of family gatherings, warm kitchens, and the sweet aroma of baking. These little gems are as delightful to make as they are to eat. When it comes to celebrations, they add a personal touch to any dessert platter. Whether it’s a holiday cookie swap or a birthday bash, these cookies are guaranteed to spark joy among friends and family alike. Who can resist the sight of a colorful array of thumbprint cookies filled with vibrant jams?
Easy to customize: Swap out jams for your favorite flavors
One of the best features of this thumbprint cookie recipe is its amazing versatility. You can easily swap out the suggested jams for your favorite flavors. Have leftover strawberry preserves? Go for it! Prefer a tart raspberry or even a luxurious chocolate ganache? The choice is yours. This flexibility makes these cookies not only a treat for your palate but also a fun canvas for your creativity. It’s an opportunity to express your taste and explore new combinations!
Quick to make: Ideal for busy weeknights or an impromptu dessert
Life gets busy, and sometimes you need a quick and satisfying dessert option. This thumbprint cookie recipe comes to the rescue. With a simple set of ingredients and a straightforward method, you can whip up a batch in no time. Whether you’re hosting friends on short notice or just craving something sweet, these cookies fit the bill perfectly. You’ll love how little time it takes to bring homemade goodness to the table!
Variations on Thumbprint Cookies
The beauty of a classic thumbprint cookie recipe lies in its versatility. While the traditional version is delightful on its own, experimenting with various flavors and textures can transform these little treats into something truly special.
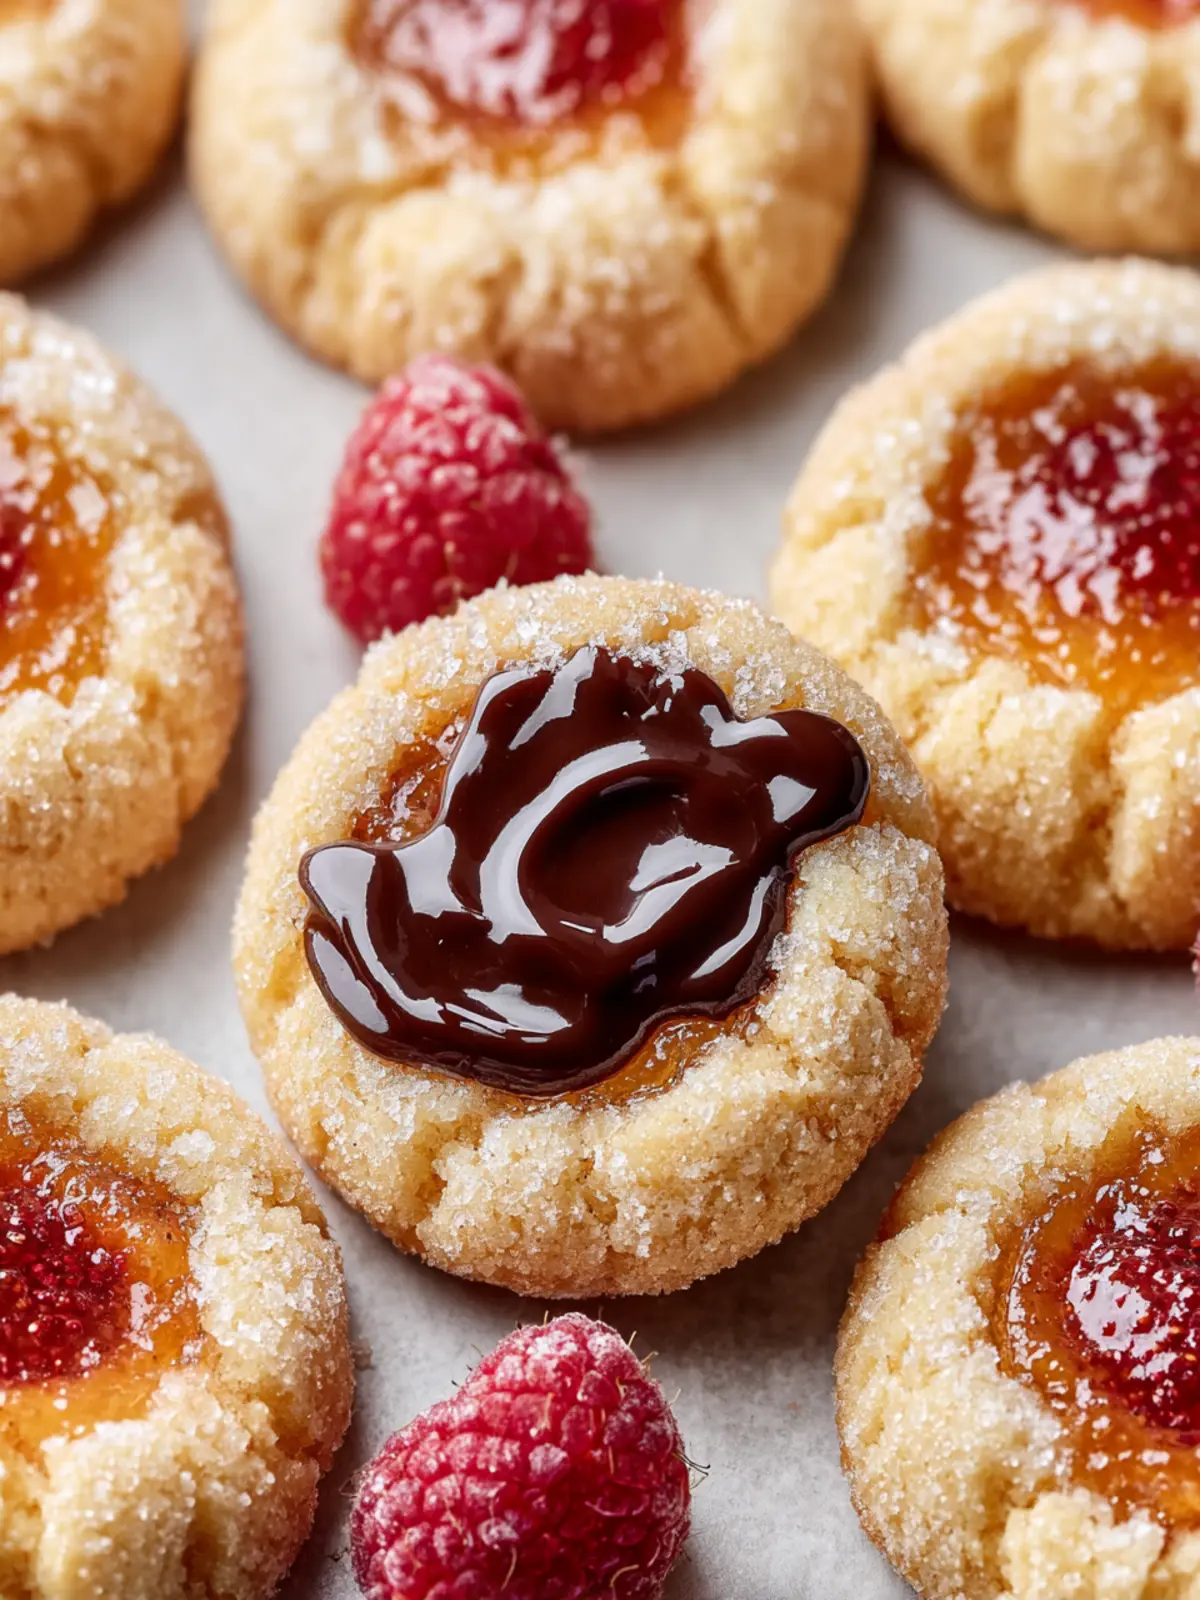
Different Jams
Don’t limit yourself to just one jam! Explore the delightful spectrum of flavors—think raspberry for a tart kick, apricot for a sweet twist, or even lemon curd for a zesty surprise. Each jam not only adds unique sweetness but also brings a pop of color that will make your cookies visually stunning. Try combining jams for an unexpected flavor fusion that will keep your friends guessing!
Nutty Additions
Want to add some texture? Fold in chopped nuts like walnuts or pecans into your thumbprint cookie dough. This simple step enhances the flavor profile and gives your cookies an enjoyable crunch with every bite. Not a fan of nuts? Toasted coconut flakes or even crushed graham crackers can offer an alternative crunch while keeping the spirit of the cookies intact.
Decorate
To elevate your thumbprint cookies, consider a chocolate drizzle or a sprinkle of sea salt. A rich dark chocolate drizzle adds a decadent touch, complementing the sweetness of the jam, while a pinch of sea salt can accentuate the flavors beautifully. You’ll create cookies that not only taste great but also impress everyone with their gourmet presentation.
By exploring these variations, your thumbprint cookie recipe can be a delightful canvas for creativity, inviting you to express your culinary personality every time you bake.
Cooking Tips and Notes
Creating the perfect thumbprint cookie recipe is all about the details, and trust me, the right techniques can make a significant difference in your cookie outcome. Here are some helpful tips to ensure your cookies are soft, flavorful, and irresistibly fun to make.
Room temperature ingredients
Start by allowing your butter and egg to come to room temperature. This small step is crucial for ensuring that your dough mixes perfectly. Room temperature butter creams better and incorporates air, resulting in a lighter texture. Similarly, a room temperature egg emulsifies nicely, helping your ingredients blend seamlessly.
Don’t overmix
It might be tempting to mix your dough until it’s smooth, but resist that urge! Stir until just combined to maintain that sought-after softness in your cookies. Overmixing activates the gluten in the flour, which can lead to denser cookies instead of the pillowy treats we adore.
Testing for doneness
When your cookies are in the oven, keep an eye on them! Look for a lightly golden brown edge with a soft center. This visual cue is key; they’ll continue to cook a bit as they cool, so don’t wait for an overly firm texture. That glorious soft center is what you want when you take that first bite! Happy baking!

Serving Suggestions for Thumbprint Cookies
Crafting the perfect thumbprint cookie recipe isn’t just about baking; it’s also about how you serve these delightful treats. Allow me to share some thoughtful suggestions for making the most of your cookies.
Pairing with coffee or tea
Imagine enjoying a warm cup of your favorite coffee or tea while savoring a thumbprint cookie. The rich, buttery flavor and the fruity jam filling are a match made in dessert heaven! Whether you prefer a bold espresso or a comforting herbal tea, these cookies elevate your beverage experience to new heights.
Storing
To keep your freshly baked thumbprint cookies at their best, store them in an airtight container. This simple tip ensures they stay delicious and moist for days, making them perfect for snacks or casual gatherings with friends.
Presentation
When it comes to serving, don’t underestimate the power of a decorative platter. Arrange your thumbprint cookies artfully for parties or gift-giving. A beautiful display not only showcases your baking skills but also makes for a thoughtful treat for loved ones, leaving them impressed and eager for more.
Time Breakdown for Thumbprint Cookies
Baking a delightful batch of thumbprint cookies is a specific art that requires just the right dedication of your time. Here’s how to craft these sweet treats without feeling rushed.
Preparation time: 15 minutes
Gather your ingredients and mix the buttery dough together. Shape them into lovely little rounds, then make a thumbprint indentation in each one — this is where the jam will shine.
Baking time: 12-18 minutes
Pop those cookie trays into the oven, and let the warmth work its magic. You’ll want to keep an eye on them to ensure they’re golden and delightful.
Cooling time: 30 minutes
Once baked to perfection, let the cookies cool on a wire rack. This step is crucial, as it’ll allow the jam to set beautifully.
Total time: 1 hour
In just one hour, you can have a batch of mouthwatering thumbprint cookies ready to share with friends and family!
Nutritional Facts for Thumbprint Cookies
Decadent and delightful, thumbprint cookies not only satisfy your sweet tooth but also provide a balanced treat that’s perfect for any occasion. Here’s a quick overview of the nutrition packed into each delightful morsel:
- Calories: Approximately 90 calories per cookie
- Total fat: About 5 grams, ensuring that these treats have a rich flavor without overwhelming your daily intake
- Carbohydrates: Approximately 10 grams, making them a satisfying yet not overly indulgent option
- Sugar content: Roughly 5 grams, striking a balance between sweetness and responsible consumption
Understanding the nutritional profile of this thumbprint cookie recipe allows you to enjoy each bite with a little extra perspective on your dietary choices. Indulge wisely!
FAQs about Thumbprint Cookies
Creating the perfect thumbprint cookie recipe often leads to questions that can make or break your baking experience. Let’s dive into some common queries to help you on your cookie journey.
Can I use store-bought jam for this recipe?
Absolutely! While homemade jam can offer a unique taste, using store-bought jam is a convenient and delicious option. Just ensure the flavor complements your cookies. Raspberry, apricot, and strawberry jams are classic choices that work wonderfully in this thumbprint cookie recipe.
How do I store leftover cookies?
To keep your thumbprint cookies fresh, store them in an airtight container at room temperature. This way, they’ll maintain their soft texture and flavor for up to a week. If you’re dealing with a larger batch, you can separate layers with parchment paper to prevent sticking.
Can I freeze thumbprint cookies?
Yes, freezing thumbprint cookies is a great way to save some for later! Place them in a single layer on a baking sheet until frozen solid, then transfer them to a freezer-safe container. They can last up to three months frozen. Just let them thaw at room temperature before enjoying!
What can I substitute for butter in this recipe?
If you’re looking for a butter substitute, there are a few options! Coconut oil is a popular choice, providing a subtle flavor. You can also use unsweetened applesauce for a healthier alternative. Just be aware that substituting may alter the cookie’s texture slightly, so it might take a bit of experimentation to find your perfect match.
Engaging with these FAQs can help you make informed decisions and ensure your thumbprint cookie recipe turns out beautifully every time!
Conclusion on Thumbprint Cookie Recipe
A sweet ending for any meal: These cookies are sure to bring smiles and create lasting memories. As you savor each bite of these delightful thumbprint cookies, you’ll find the perfect harmony of buttery dough and rich filling. This thumbprint cookie recipe is more than just a treat; it’s an invitation to connect with friends and family, whether it’s a holiday gathering or a simple weekend bake-off. So go ahead, make a batch, and watch as the joyful faces around you light up with every delightful bite. It’s a sweet tradition that will keep everyone coming back for more!
Print
Jam Thumbprint Cookies
- Total Time: 30 minutes
- Yield: 24 cookies 1x
- Diet: Vegetarian
Description
Delicious thumbprint cookies filled with your favorite jam, perfect for any occasion.
Ingredients
Scale
- 2 cups all purpose flour
- ½ teaspoon baking powder
- ½ teaspoon baking soda
- ½ teaspoon kosher salt
- ½ cup unsalted butter (at room temperature)
- ½ cup granulated sugar
- ¼ cup light brown sugar (lightly packed)
- 1 large egg
- 1 ½ teaspoons vanilla extract
- ¼ cup thick jam or preserves (any flavor)
- ¼ cup granulated sugar (for rolling)
Instructions
- Preheat oven to 350 F. Line 2 baking sheets with parchment paper or silicone baking mat. Set aside.
- In a medium bowl, whisk together flour, baking powder, baking soda, and salt. Set aside.
- In the bowl of your stand mixer fitted with the paddle attachment, beat together butter, sugar, and brown sugar until fluffy and combined, about 2-3 minutes.
- Add egg and vanilla. Mix until combined.
- Add flour mixture to the wet ingredients. Stir until just combined and a cookie dough forms.
- Using a small cookie scoop, scoop the dough into balls.
- Add the remaining granulated sugar to a small, shallow dish, and roll balls in sugar to coat the outside.
- Place evenly spaced about 2 inches apart on the baking sheets.
- Use your thumb to press an indentation into the center of each cookie.
- Spoon ½ teaspoon of jam into the well of each cookie dough. Repeat with all cookies.
- Bake for about 12-18 minutes, or until lightly golden brown.
- Let cool completely on the baking sheet.
Notes
- Store cookies in an airtight container for up to a week.
- Feel free to experiment with different flavors of jam for variation.
- Prep Time: 15 minutes
- Cook Time: 15 minutes
- Category: Dessert
- Method: Baking
- Cuisine: American
Nutrition
- Serving Size: 1 cookie
- Calories: 120
- Sugar: 8g
- Sodium: 50mg
- Fat: 6g
- Saturated Fat: 4g
- Unsaturated Fat: 2g
- Trans Fat: 0g
- Carbohydrates: 16g
- Fiber: 0g
- Protein: 1g
- Cholesterol: 25mg